Wednesday, July 17, 2013

She Will Get a Barn Door

It's 100% done!  Can you believe it?  I can barely believe it!  Promax Construction has completed all of the work, not only does it feel like we have our house back but we also now have our life back!  In addition to installing the white base boards, they installed the 7 foot wide sliding barn door.  Matt and I picked out the door design and stain color, then Promax built the door.  It was so large they had to bring it into the basement in two pieces and put it back together before hanging it, but It looks amazing!  Below are some before and after installation pictures.

Before
Picture of the full wall that will hold the sliding barn door.  The header on this wall above the entry way was added to help support the hardware for the door.
Shot from the play room side into the "man cave".  Once the barn door is installed it can slide all the way closed to provide some privacy to this area.  The original plan for this room in addition to a "man cave" was to also offer us another guest room (couch pulls out to sleeper)

During
This is the back of the door or the part that the play room will see when the door is closed.  You can see the hardware has been installed on the top, but obviously it has not been hung.

After
It is really hard to tell, but there is a light switch in between the door and the end of the wall.  If the door is completely shut or completely open, this light switch is still accessible.  The black contraption on the floor helps to keep the door on track.  We need to get one more to help, but for now this works.  

Close up of hardware from Rustic Hardware.  While we did not order our barn door from Rustic Hardware, we did visit their site for design ideas.  

This is a shot from the play room into the "man cave".   


We absolutely LOVE the barn door.  This is something we discussed building/buying and installing ourselves, but didn't trust ourselves to complete.  When interviewing potential contractors, this was a MUST have on our basement renovation list because we really thought it would be the perfect way to add another guest room without closing up the walls and making the room seem smaller.  Now that the door is installed, I think it also adds a great design element and is quite the show stopper.  

Friday, June 28, 2013

92.5% DONE!

The floors are down, the countertop has been intalled, the backsplash has been tiled & grouted, the toilet & half bath have been re-installed in the half bath, the walls are painted, and the carpet is down.  We can see the finish line!  The last few pieces are painting and installing the base boards, picking out and hanging the finishing pieces for the half bath, and finally, installing the sliding barn door in the basement.  I know a lot of people are excited about the sliding barn door, but unfortunately the hardware won't even ship out until next week so you'll have to wait a little longer to see the finished product. 

On to the photo tour of the updates!

Kitchen - Before

This is the best picture I have of the kitchen before we painted the cabinets white.  

This is what we had when the contractor started.  We painte the cabinets white last October and have been waiting to complete the rest of the kitchen.

After
I clearly need to wipe down the fridge!

Dining Room - Before
We don't have a great before shot of the dining room, but here you can see it with the carpet and the girls.

After
I cannot even explain to people how much I love this floor.  Will we be able to see dust?  Sure, but the color and finish are just the look we wanted and makes the whole house feel more modern.  I would love to replace the light fixture with a pendant and we need more art work along with a bright rug, but we'll get there eventually.  

Basement - Before


During


After

The cut out in the right hand side of the screen will eventually be a playhouse.  This is the space under the stairs and was previously used for storage.  I want to add any awning and flower box, but that's all down the line.

The room in the back is a guest room/office.  It needs a lot of help, but it's our next project.

 On a side note, Morgan looks so big in this photo.  She is really turning into a special and fun girl.  Matt and I are so proud of both girls.  We made some pretty great kids (don't tell Matt, but I think we should keep making them)!

The girls LOVE running around in the open space of the basement.  I almost feel bad that we have to move furniture back down there.  I do think they'll still have plenty of open space even after we move their toys down.  

Half Bath - Before

The pain splotch on the left hand side is when we were trying out different paint colors.  We ended up choosing a light teal color called Aqua Breeze from Behr.  

During - Phase 1

 We still need a mirror, light fixture, towel rack, toilet paper holder, etc., but the bulk of the work is done!  The vanity and faucet have an Asian feel and we have some paintings we bought while in China that will be hung on the walls in here.

This before and after is probably the best way to show the new floor color.  Don't you love it?
 Close up of the vanity, we seriously LOVE this vanity.  It looks amazing in the room and is a little smaller than the previous vanity so it makes the room feel a little bigger.
Close up of the faucet.  The paintings we have from China have a bamboo frame, so we thought this was a great fit.  I love the waterfall feel it offers as well.

This weekend will be all about moving stuff back to it's original location, cleaning, and showing the place off to friends.  We'll actually be home this weekend (shocker), so we want as many people as possible to come over and check it out!

Monday, June 24, 2013

She Will Make a BIG Change

When Matt and I first moved into our house we knew there were several things we wanted to change/upgrade, but the biggest item was the hardwood floors.  The original floors were an engineered hardwood that had not held up well at all over their 10 year life span.   Plus, we wanted to expand the hardwood floors into the dining room which is currently covered in carpet.  We originally contacted a company about refinishing them, but were told there was only a 50/50 chance it would work and we would be out the money and have to replace the floors completely if it didn't work.  Replacing the floors was the only feasible option, but it was an expensive one and would have to wait until we felt financially ready. 

Fast forward 1.5 years to when Matt and I finally feel we are ready to make a change.  We met with several contractors to get pricing on the floors and decided to ask about adding granite countertops, a backsplash, and finishing the basement.  The basement is currently half finished with one bedroom and a full bath.  Our thought process was that we may as well get the quotes for all the projects we want completed to understand the full cost and then make an informed decision on what projects we want to tackle. 

After reviewing all of the proposals, Matt and I pulled up our big boy/girl pants, chose a contractor and communicated that we wanted to move forward on ALL proposed projects.  We knew this would cost a much larger chunk of money than we originally planned and would take a little longer, but in the long run it would make us love our house even more.  After signing the contract, we were given 4 weeks to select designs, order products, and finish painting all of the trim on the first floor and basement white....WAIT...WHAT?!?  Did you just say paint all of the trim white?  Yep, that's what I said!  We decided to paint the trim in the house white when we were decorating Amelia's nursery and started with her room.  Matt did all of the painting himself to cut down on cost.  Since we weren't on any real timeline, the process has been incredibly slow.  Until now...we obviously had to speed up our process and get the trim painted more quickly.  Matt was painting trim left and right.  He didn't really trust me to help out and to be honest, I didn't really mind! 

Fast forward 4 weeks, we have picked out tile from the Debris series at FireClay Tile, easily decided on a granite color, agonized over a 4 3/4 inc hand scraped floor in a deep brown shade, ordered & returned a half bath vanity from Home Depot 3 times, argued over a kitchen faucet design and finally decided on paint colors for the half bath and basement!  It's been exhausting and I've never felt so uncertain about my decisions, but we made a pact early on to make decisions that fit us and not to constantly think about resale.  Not sure it will help in the long run, but it will definitely make the house more "us" and really make it into a home we love.

Without further ado, I'm going to share pictures of the kitchen as it has progressed.  We still have more to go, but this is by far the room that has shown the greatest visual improvement!

Before
The kitchen is bright, but a little too monochromatic for our taste.   Plus, you can't really tell, but the engineered hardwood is very worn.  I think it's normally supposed to last 25 years, but I was getting worried the girls would get splinters and it had only been 10 years since the house had been built.

During - Phase 1
I took the before picture and Matt has taken the after pictures.  We obviously did not discuss the point of view shots we wanted so you won't see the same before shot again until the very end.  We took this shot the night before the counters were installed and right after all of the original flooring was removed.  I'm getting pretty used to wearing shoes all through our house!

During - Phase 2
Granite countertops in Black Pearl were installed in about an hour and a half.  I'll have to try and get a close up to show you the variance in the granite.  Matt "loves" it and is constantly wiping it down and admiring it.  It may mean more to him than his golf clubs (this is not true of course, but I'm sure the countertops are a close 2nd).  This picture was taken before the faucet was installed.  We went back and forth on the faucet and ended up going with the Delta Trinsic Single Handle Pull Down Kitchen Faucet.  It is touch sensitive and so far we LOVE it.  It takes a little getting used to, but not using your hands to turn on and off the faucet is a big help when you've got a big mess on your hands (literally)!

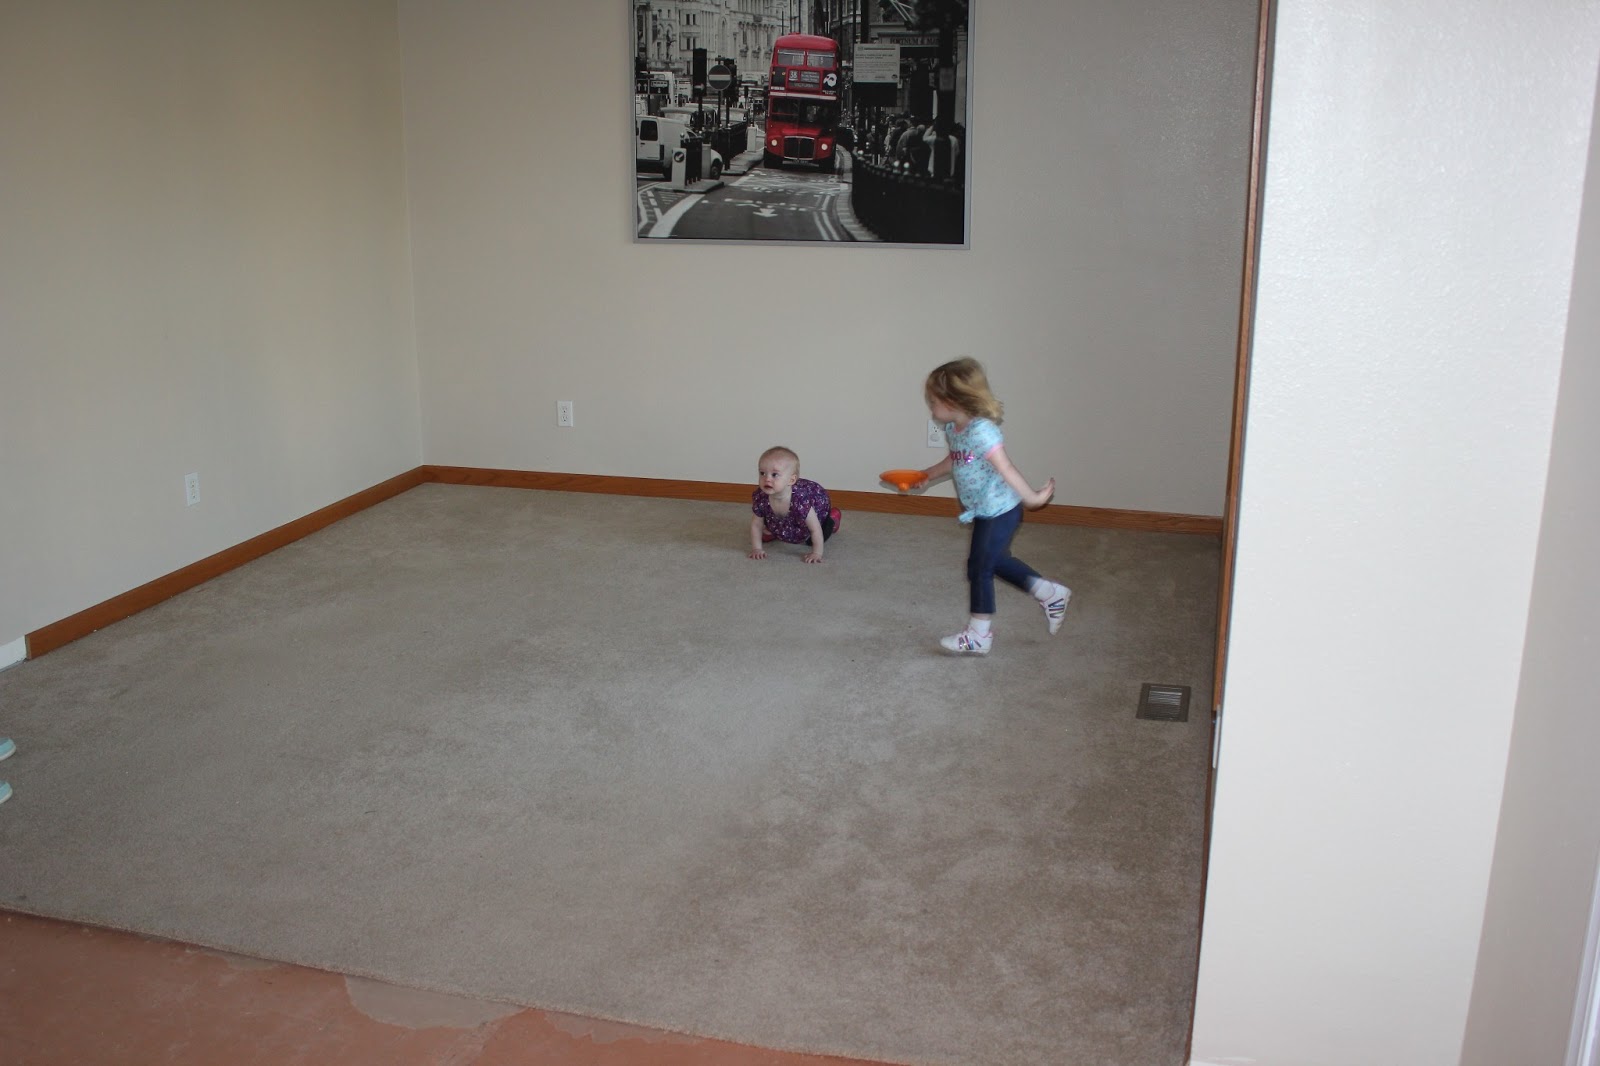
Just for fun I thought I would share this shot of Amelia enjoying the freedom the open kitchen allows.  Since we are renovating half of the first floor and the basement, pretty much everything from those spaces is crammed into our carpeted family room and play room.  Check out the chaos below:

 Family Room DISASTER!  Yes, those are CD's in the corner over there.  I guess I should go through them and figure out whether they're really worth saving.  Maybe I'll find a classic Ace of Base album!

Play Room HAVOC!

During - Phase 3
This gives you an almost decent shot of the faucet, but does let you see what is going on today.  We ordered the Debris Series Fireclay Tile in the 2x6 size and we are going with a 3/8 inch white grout.  It will be a lot of grout, but the tile can be a little dark, so it was important we had the white grout to balance it out.  Before we committed and ordered the tile, Matt drew out to scale drawings of each of the different tile sizes and we hung those up on the wall.  We actually kept them up for a couple of days before agreeing on the size and placing the order.  The Fireclay Tile was definitely a splurge, but in the end we think it will be the biggest part of the renovation that screams us.  It's bright, it's fun, and most importantly, it's green!

Stay tuned for more tomorrow when I'll show off where we are on the basement reno!


Monday, April 8, 2013

She Will Finally Hang Some Art

This last weekend served as a reminder to how lucky I am to have a husband who is my partner in every sense of the word.  Not only is Matt an excellent husband and father, but he is my best friend.  He indulges my crazy decorating ideas/suggestions and more often than not, helps me put it all together.  For example, when I suggested upholstering our own headboard, Matt got really into the idea and not only helped me with execution, but was responsible for a lot of the finishing details including staining the 2x4s that hold the actual headboard up.  The reason I felt the need to give a shout out to my number one guy is because during the past weekend, I had people ask how I have time to do everything with two kids.  I am by no means Wonder Woman, as there are many ladies out there who have just as many, if not more, kids and are way more involved in word, community, school, etc.  I do know that I would not be able to do even half of the things I do without the support of Matt.  A good partner makes everything so much easier.  We laugh and cry over all of our triumphs and tribulations together.  There are definitely nights when we are totally exhausted and we don't do anything but lay on the couch together, but there are other nights when we put the kids to bed, one of us runs out for a DQ blizzard, and then we get started on a fun house project.  I hope everyone gets the chance to be as lucky as me and spend the rest of their life with their best friend, living an unbelievably happy life!

Alright, on to more exciting stuff...bedroom art!  Shortly after we moved into our home, Matt and I bought new bedding for our master bedroom.  The bedding is predominantly brown with nature accents in blue, green, white, and beige.  We have quite a bit of wall space and started looking for art to hang on the walls that would fit in with the nature theme of the bedding.  Something 3D or with more texture appealed to us and our aesthetic.  While we were out at Pier 1, we saw a large piece of art made with wood and nails.  The body of the art piece was wood, painted red, and then a decorative design was installed on the wood with nails.  The effect was really cool and to me, looked pretty easy to replicate. 

Matt can cut wood and nail pieces together, but I was worried it would take too long for him to put together and that it would be too difficult for me to nail or lug around.  Michaels was having a sale on their canvases that week, so I bought some larger canvases and headed over to Lowes to pick up a small sample can of green paint and several packages of bronze furniture tacks.  I actually bought all of the packages of bronze furniture tacks.  I'm sure I screwed up their ordering for several weeks since I had to keep going back to buy the packages! 

Once at home, I painted the canvases, including the sides, in green.  While the canvases were drying, I started sketching out some leaf designs.  I knew I wanted to create a leaf design to go with the nature patterns that show up on our comforter.  One day I will show you a picture of our comforter, along with the headboard Matt created, and this will all make sense! 

After the paint dried, I just started pushing the tacks in.  It was a little scary because the tacks definitely leave noticeable holes and I didn't want to have too many oops holes, but all in all, it went pretty quickly.  At the end we decided to hammer in furniture tacks around the perimeter and I think it really gave the art a more finished look.  I'm really sorry I don't have more pictures of each stage, but we started the project when we had our old camera and since then have replaced not only the camera, but also the laptop.  In order to access those old pics, I would need to search through our external hard drive.  Not exactly a fun time! 

Below are some close ups of the two pieces I did finish.

Not too bad and all in all, a pretty easy project!  Furniture tacks come in a couple of different finishes, so this project can be so easily customized to fit your art needs.  If you had a daughter with a princess-themed bedroom, you could use a brighter shade on the canvas and use silver tacks to create a crown shape.  Honestly, the possibilities are limitless. 

We only have two pieces complete right now, but I do think the wall would look better with three in a row or 4 in a square/rectangle layout.  I'm hoping to post some more pics later this week on the whole master bedroom, so I'll probably ask for some feedback then.  In the meantime, enjoy!


Lori

Tuesday, March 26, 2013

She Will Remake a Favorite

Rachel Ray's Everyday magazine is my absolutely FAVORITE magazine.  It has a wide variety of recipes that vary in difficulty and prep time.  Everyday mag also has great ideas on vacation spots as well as fashion and home decor.  I have been getting this magazine for over 6 years and I make sure to keep this renewed at all times.  In fact, I renew this so often, I'm pretty sure I have at least 2 years in the pipeline!

One of my favorite recipes from Everyday mag, Matt and I found during our first year of marriage and our first year in Maryland.  It was for a greek dish, Meaty Moussaka.  Neither Matt nor I had a lot of experience with Moussaka previously but the basic idea of meat and cheese appealed to us.  The flavors were incredible, but this is not a great choice if you are looking to cut back on fat and calories.     

2 years later, Everyday Mag revamped the Meaty Moussaka recipe to make it a little healthier.  The new Moussaka recipe included roasted zucchini and eggplant in the meat base and used cottage cheese to make the creamy cheese top.  While it still tasted good, it didn't keep a lot of the spices that made the Meaty Moussaka so flavorful.  I still made it several times and even switched out the ground beef for MorningStar meat-like crumbles to make this meal vegetarian-friendly.  

A week ago Matt and I were trying to determine our weekly menu and were brainstorming recipes we hadn't tried in awhile.  Matt suggested moussaka so I picked up all of the ingredients for the lighter moussaka version, replacing ground beef with ground turkey.  We roasted the eggplant and zucchini to layer on the bottom of a 13 x 9  pan.

While creating the turkey mixture, I followed the recipe but decided to add in the spices from the original Meaty Moussaka recipe.  
I layered the meat over the veggies, then added pureed cottage cheese and topped with gruyere cheese.

Below is a better shot of the layers.
The dish bakes for 17 minutes, until the top is nice and bubbly!

If you have the time, I do recommend letting the dish cool to give it time to soak up all of the juices.  
This turned out PERFECTLY!  The addition of the cinnamon from the original recipe to the lighter recipe made this so much more flavorful.  Matt and I gladly gobbled this up for lunch the next several days.  I actually missed it once it was all gone.  I really feel like this could very easily be a family favorite for any family.  The flavors and ingredients are simple and can be altered to better suit your family's tastes.  If you are in the mood to try something a little Greek, you should definitely check these recipes out!

Lori 

Monday, March 18, 2013

She Will Finally Finish!

One of the first DIY projects I ever pinned and fell in love with on Pinterest was a reclaimed wood wall art project at Shanty 2 Chic.  It was simple and looked easy enough to put together.  Matt doesn't allow me to touch the power tools as he is afraid I will cut off my fingers and to be honest, it's not an unfair assessment.  He was in charge of making the sign and decided on a deep walnut stain.  We originally hung it in our bedroom, but after moving some furniture around after Christmas, we moved it to the family room, where it can be enjoyed by more people!

The sign is actually a combination of 1x6 and 1x2 boards.  It might have received a light sanding before the stain was applied, but other than that it is a pretty raw sign.  
Matt completed the wood sign at least a year ago, so we have been debating for some time on what quote we would put on the board.  My original inspiration just used the word, "love" and I liked that, but Matt wanted to do a little something more.  I had been pinning different quotes, but nothing really spoke to us.  Finally, inspiration struck!  Matt and I had been debating about whether to stay in Mahomet or move closer to our family and friends in the Naperville area.  We didn't know what to do but knew we needed to come to a decision so we could move forward with plans either way.  I was driving home from a particularly exciting book club and the Philip Phillips song, "Home" came on the radio.  That song has been speaking to me for awhile but on that night, while listening to that song, I knew staying in Mahomet was the right choice for us.  We have a great house, our kids attend an amazing daycare, and we are surrounded by lifetime friends, what more could we want?

The very next night Matt and I sat down to talk about the move and we agreed that staying in Mahomet for at least another 2-3 years was the right decision for us and our little family.  I also told Matt about the quote I wanted to use and how I wanted it to look, he was sold!  Unfortunately, this decision was made in the fall and I did not get my Silhouette until Christmas, so we still had some time before the sign was completed.  We finally found some unexpected free time this past week and finished up the sign.

I cut the quote out of vinyl and got out my Omnigrid to help put it on.  I know you can use transfer paper and I have heard that painters tape works great for transfering vinyl quotes as well, but I didn't have either and I was determined to get it done.  
I even had a helper watch over the whole process.
When the vinyl was on and the sign was up, Matt and I were both ecstatic with the results.  It's one of my favorite things in our family room and it's perfect for us!
Anyone else out there have Pinterest projects that you really want to get done but need the right motivation?  Anyone else have to make the agonizing decision about moving to be closer to family or staying right where you are?

Lori 

Thursday, March 14, 2013

She Will Go From Scratch

I've heard about people who make cinnamon rolls from scratch, but I never really understood them.  Pillsbury and Cinnabon make some mighty tasty cinnamon rolls, why mess with success?  We love to make breakfast on the weekends when we are home and I really wanted to try something new.  After searching through Pinterest, Matt kept asking about the Overnight Caramel Pecan Cinnamon Rolls.  I took a look at the recipe and while it had a lot of steps, nothing seemed too difficult so we decided to give it a go.

Overnight Caramel Pecan Cinnamon Rolls
Degree of Difficulty: 8
Mess Factor: 9
Taste: 8

There are a LOT of steps with this process and several resting periods, so making these the night before is definitely recommended.  First you make the dough and allow it to rest for an hour.  Once the dough has rested, you will roll it out into a large rectangle and brush it with a LOT of butter.  The recipe calls for 1 cup of butter, but we had a ton leftover, so I would stick with a 1/2 cup or 1 stick.
Once the butter is slathered on, the next step is to sprinkle a combination of sugar, brown sugar, and cinnamon all over the dough.
If you are following the directions you would also add crushed pecans and raisins, but we opted to skip this because I don't really care for pecans and Matt doesn't really care for raisins.  After tasting the final product, I do think pecans would have been a good addition.  They would have added a good crunchy texture.  Once the dough is saturated in butter and sugar, roll it up starting from the widest end.
This step wasn't difficult, so much as messy.  I am fortunate enough to have cleaning people come once a month and we made this the night after they came, so it just felt like we wasted all of that clean counter!

Once the dough has been rolled up, slice it into 1 to 1 1/2 inch sections.
Butter the bottom and sides of a 13 x 9 inch pan and place the cinnamon rolls into the pan, swirly sides up!
Leave some space between the cinnamon rolls and leave them out for another hour to allow the rolls to rise a little more.
If you are making these same day, you can put them in the oven after the hour of rise time.  Otherwise, put a lid on your pan and place them in the fridge overnight.  In the morning, take the rolls out of the fridge and allow time for the rolls to come to room temperature.
 
Once the rolls have come to room temperature, put them in a 375 degree oven for 20-25 minutes.  While the rolls are baking, make the caramel sauce.  Pour the caramel sauce over the rolls immediately after taking the rolls from the oven.  It will seem like you have too much caramel sauce, but keep pouring.  The caramel seeps down into all of the nooks and crannies to saturate these babies in sugary goodness.
These rolls are incredibly rich.  You can literally taste butter and sugar in every bite!  I could not eat more than one, but my caramel-obsessed husband ate two!
Even though they were a LOT of work and the cinnamon rolls from a can are delicious, these are worth it.  Not something I would make anytime I get in a cinnamon roll mood, but definitely something I would try again for special occasions.  Matt's family grew up eating cinnamon rolls on Christmas morning, so I would definitely contemplate breaking out this recipe to spice up that holiday tradition!
Make sure you have plenty of milk on hand to enjoy this beauty!

Is there anything you have ever wanted to try and make from scratch?  Any luck?  Was it worth it?  One day I do want to make croissants, but I have a feeling that day is FAR away!

Lori